Turning Your Backyard Vision Into a Patio You Will Love
You know how a poorly planned backyard project can quickly turn into a headache of unused space and wasted budget. As a professional service team, we often see homeowners rush into picking materials before locking down a solid layout. That misstep is exactly what separates a patio that feels like a natural extension of a home from one that feels like an afterthought.
Learning how to design a backyard patio transforms the way a property looks and fundamentally changes daily routines. Charlotte property owners hold a distinct advantage with a climate that allows patio use eight to ten months out of the year.
The return on investment makes this planning phase incredibly worthwhile.
So, we will break down the most critical design factors and then walk through the exact seven steps you need to take.
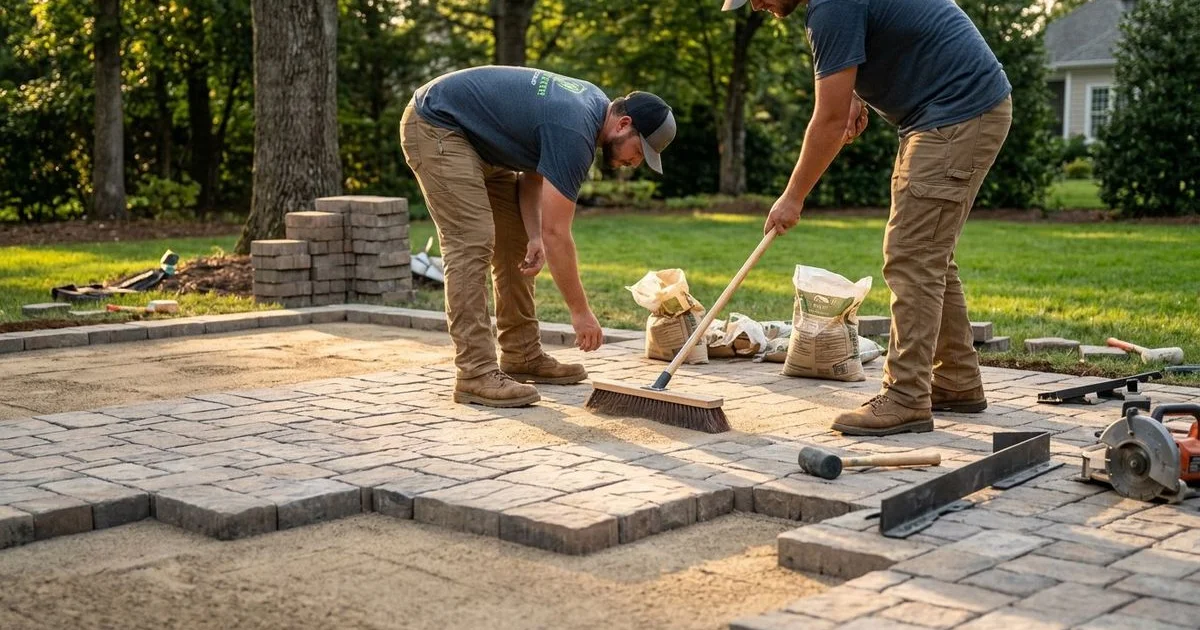
Step 1: Define How You Want to Use Your Patio
Before looking at materials or shapes, start with the most fundamental question: what do you actually want to do on your patio? Taking the time to think through lifestyle habits drives every other design decision.
Consider how many people you typically entertain. A couple enjoying quiet dinners requires very different spatial planning than a family hosting neighborhood cookouts for twenty guests.
Our project managers find that prioritizing specific features early helps you allocate your budget effectively. You will want to make a list of must-have features versus nice-to-have additions.
Here are the most highly requested features we see adding the most value in recent projects:
- Outdoor Kitchens: A 2026 industry report shows outdoor kitchens can add 1.5 to 3.0 times their cost to your home resale value.
- Pizza Ovens: Over fifty percent of design experts in 2025 named the pizza oven as the most desired outdoor cooking feature.
- Fire Pits: A fire pit conversation area works well on a slightly lower level and benefits from some separation from the house.
- Container Gardens: Dedicated spaces for raised planters help soften hardscape lines.
Think about how your needs might change over the next five to ten years.
We highly recommend designing with flexibility in mind. If you have young children, you might want open sight lines from the patio to the yard. Accessibility features like gentle ramps instead of steps become much more relevant as you approach retirement.
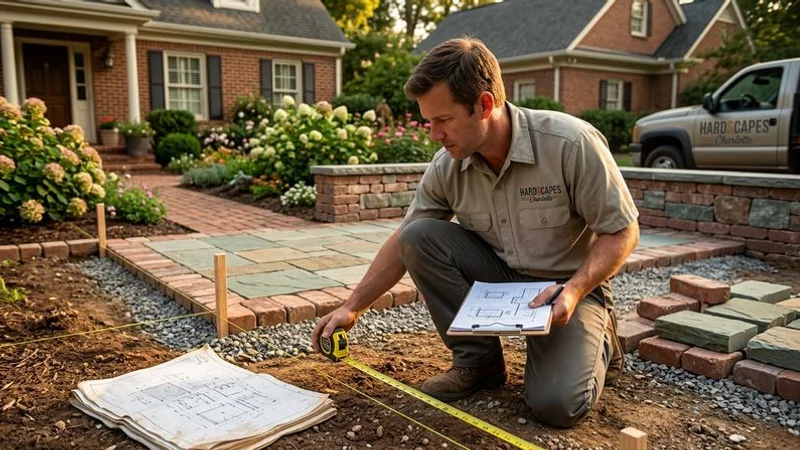
Step 2: Assess Your Property and Site Conditions
Every backyard has unique characteristics that influence the final design. Spend time understanding what your property offers and what specific challenges it presents before sketching any layouts.
Topography and Drainage
Walk your backyard after a heavy rain and observe where water flows and collects. Frequent storms in the US mean your design must account for active water management. Ideally, water should flow away from your home foundation and never pool on the surface.
Our installation crews know that Charlotte’s heavy red clay soil drains incredibly slowly. Standing water becomes a persistent issue if left unaddressed.
You will likely need to integrate specific solutions like French drains or a stepped design to create a level area while maintaining proper water runoff. Note any low spots or existing drainage problems during your initial assessment. These conditions do not prevent a beautiful build, but they completely dictate the grading approach.
Sun, Shade, and Existing Features
Observe your backyard at different times of day and during different seasons. An area pleasantly shaded at ten in the morning might sit in brutal direct sun by four in the afternoon.
We always evaluate natural shade from mature trees as a tremendous asset. Tree roots and falling debris still need to be calculated into the final plan. Your design should accommodate structures like pergolas or shade sails if natural shade is limited.
Take a quick inventory of what already exists in your yard. Mature trees, garden beds, and property setback lines all influence where structures can go.
The Hidden Underground Factors
Underground utilities dictate more than most people realize. HVAC units, septic systems, and buried lines limit placement options.
We strongly advise calling 811 to have public utility lines marked before finalizing any dimensions. Many local Homeowner Associations (HOA) also dictate what can be built and exactly where it must sit. Checking these guidelines early prevents expensive revisions later.
Step 3: Determine the Right Size
One of the most common mistakes in patio planning is making the space too small. A layout that looks generous on paper often feels cramped once furniture is in place.
We use specific industry benchmarks to size areas appropriately for each intended use.
| Primary Activity | Minimum Recommended Size | Ideal Space Allocation |
|---|---|---|
| Dining (6 people) | 12 x 12 feet | 14 x 14 feet (allows walking behind) |
| Lounge Area | 12 x 14 feet | Fits sofa, two chairs, and coffee table |
| Fire Pit Circle | 14-foot diameter | 16-foot diameter (safe distance) |
| Basic Grill Station | 8 x 10 feet | Includes grill and small prep area |
Cooking zones require precise measurements to function safely. The National Kitchen and Bath Association (NKBA) guidelines suggest standard outdoor setups should range between 100 and 400 square feet.
A full outdoor kitchen with multiple appliances requires 12 by 16 feet or more.
Our designers always ensure clients include at least 24 inches of uninterrupted counter space for food prep. You also need to maintain a minimum of 36 inches of clear width for all walkways to allow safe passage around hot grills.
The best trick is to use painters tape, garden hoses, or stakes and string to lay out proposed dimensions right in your yard. Set up your existing patio furniture within the marked area and see exactly how it feels. Pretend you are carrying a tray of drinks from the house to the seating area to reveal spatial problems that remain invisible on paper.
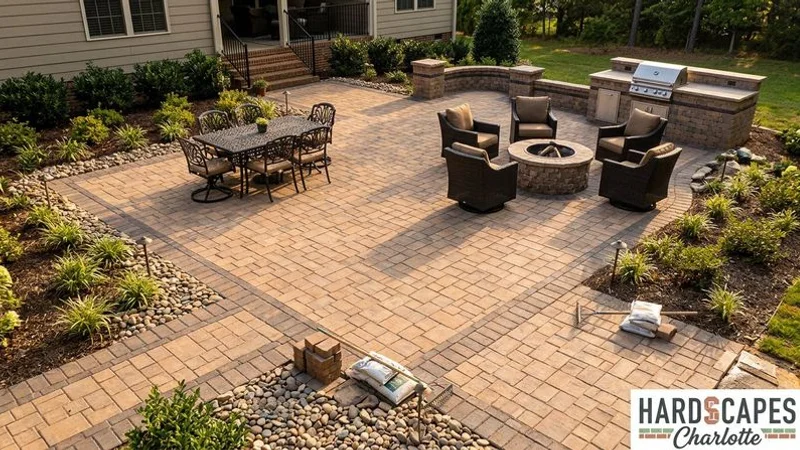
Step 4: Choose Your Layout and Shape
Your layout shape should complement your home architecture and work with your property contours.
We see several distinct approaches that consistently deliver great results.
Geometric and Linear Layouts
Rectangular and square shapes work beautifully with traditional styles common throughout established US neighborhoods. They make efficient use of space, simplify construction, and pair exceptionally well with formal furniture arrangements.
Extending a rectangular slab from large pocket sliding doors creates a clean, intentional connection between indoor and outdoor spaces. Nearly half of design experts in a recent 2025 industry poll agreed that pocket doors are the top choice for creating a seamless indoor-outdoor flow.
Organic and Curved Layouts
Freeform shapes with gentle curves feel more natural and integrate perfectly with existing landscaping. These designs work particularly well in backyards with mature gardens, natural features, or irregular lot shapes.
Our teams frequently use curved patios in wooded lots where the hardscape needs to weave around established tree roots. This ties directly into the rising trend of biophilic design in 2025. Biophilic design uses fragmented live edges where the hardscape and softscape blend seamlessly, creating a space that feels native to the environment.
Multi-Level and Wraparound Designs
A multi-level layout can turn a challenging sloped site into a highly distinctive feature. Stepped levels naturally create distinct zones for different activities. An upper dining level connected to the house easily transitions down to a lower fire pit area with a more intimate feel.
Retaining walls between these levels frequently double as built-in seating. Wraparound and L-shaped configurations maximize usable space by extending along two sides of your home. An L-shaped patio easily separates a dining area off the kitchen from a lounging area off the living room.
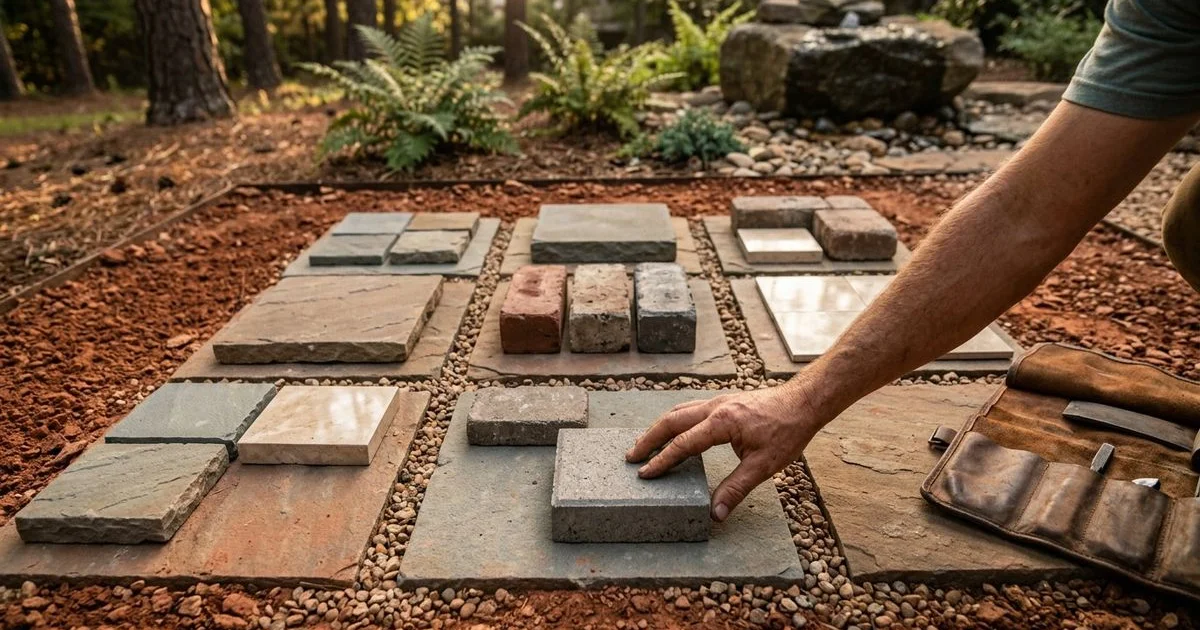
Step 5: Select Your Materials
With your size and shape established, it is time to choose the actual surface materials. Your selection must balance aesthetics, daily maintenance requirements, and your total budget.
We recommend reading our comprehensive comparison of the popular options in our guide to the best patio materials for North Carolina.
Bring physical samples home and view them against your house exterior before committing. You need to inspect them in both sun and shade, as well as when completely wet. A material that looks perfect under showroom lights might clash terribly with your siding color outdoors.
You must consider how your chosen material will age over time.
- Concrete Pavers: Paver projects in the US typically range from $23 to $50 or more per square foot, depending on the site complexity. They are incredibly durable and easy to replace individually if one cracks.
- Travertine: This natural stone remains highly sought after because it stays cool to the touch even under intense summer sun.
- Porcelain Pavers: These offer a modern, slip-resistant surface that resists algae and mold growth perfectly in humid climates.
Our crews always look at how a new surface relates to other hardscape elements in the yard. Choosing a patio material that complements an existing stone retaining wall creates immediate visual cohesion.
Selecting a versatile surface now gives you much more flexibility if you plan to add a fire pit or connecting walkways later down the road.
Step 6: Plan for Utilities and Features
Retrofitting electrical lines, gas pipes, or water connections after a slab is poured is disruptive and highly expensive. You need to plan utility requirements during the initial design phase.
We approach utility planning by mapping out every single feature that requires power or fuel.
Pro Tip: Never pour concrete or lay base gravel until all local utility inspections for buried lines have officially passed.
Outdoor lighting transforms your space from a basic daytime area into an evening retreat. You should plan for a combination of ambient string lights, recessed step lights, and bright task lighting near cooking zones. Low-voltage LED landscape lighting incorporates easily into the base preparation with minimal visible wiring.
Gas appliances demand specific early planning. If you are including a gas fire feature or permanent grill, a licensed plumber must run a dedicated gas line from your main supply. This process usually requires digging a trench at least 18 inches deep, which must be completed and inspected before any base gravel is compacted.
Electrical outlets on or near the seating areas are incredibly useful for blenders, speakers, and outdoor fans.
Our electricians ensure all exterior outlets feature Ground-Fault-Circuit-Interrupter (GFCI) protection, as required by the National Electrical Code (NEC). Planning these outlet locations early allows all conduit to run safely beneath the surface.
Irrigation for surrounding landscape beds also requires attention. A new hardscape footprint alters natural drainage patterns, meaning existing sprinkler zones will likely need immediate adjustments.
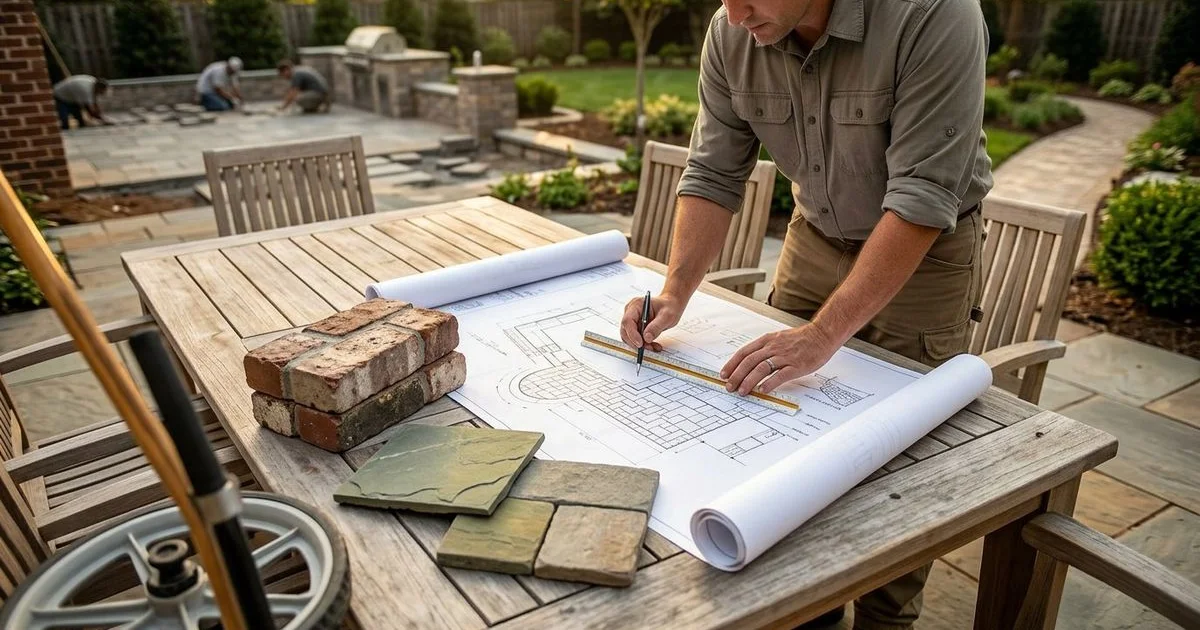
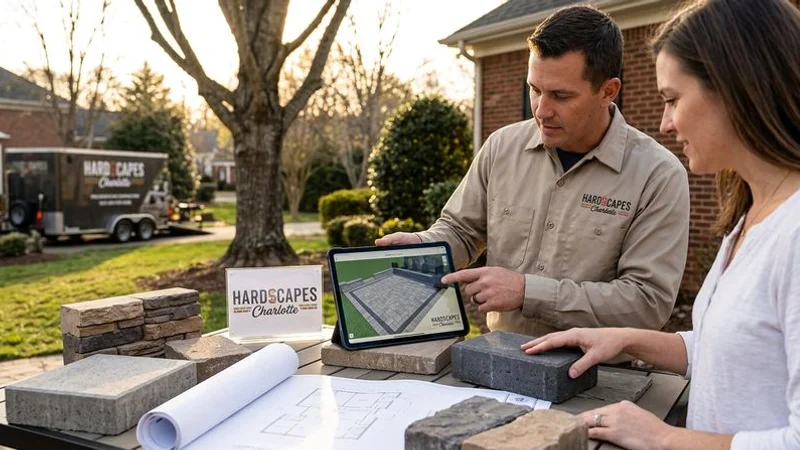
Step 7: Work With a Professional to Refine Your Design
The first six steps give you a solid foundation, but an experienced contractor brings expertise that transforms a good plan into a permanent asset. A professional designer brings deep knowledge of local building codes, drainage engineering, and advanced construction techniques.
We strongly advise checking a builder’s specific credentials before signing any contracts. Look for teams holding an Interlocking Concrete Pavement Institute (ICPI) certification, which proves they understand proper base preparation and compaction standards.
When meeting with a contractor, bring your detailed notes from the previous steps. Share your wish list, your exact budget range, and any drainage concerns about your property. A reputable company will visit your property, assess the site conditions, and provide a detailed written proposal.
Our industry is currently experiencing high demand. The Concrete Masonry and Hardscapes Association (CMHA) 2025 Contractor Industry Report highlights ongoing workforce shortages across the US. This data means top-tier installers book up months in advance, so you need to start conversations early.
Ask to see specific examples of their previous work. Most established companies maintain detailed portfolios of completed projects and gladly connect you with references from past clients.
You should always get at least three detailed written proposals before making a final decision. Compare the bottom-line price alongside the following critical specifications:
- Depth and type of base material.
- Specific brands and quality of surface pavers.
- Proposed drainage solutions.
- Length and coverage details of the warranty.
The absolute cheapest bid almost always skips critical structural steps.
Common Design Mistakes to Avoid
Over the years, we have seen several recurring mistakes that property owners make when rushing a project. Being acutely aware of these pitfalls saves you from massive correction bills later.
Undersizing the Usable Area
Making the footprint too small remains the most frequent error. Always err on the side of slightly larger than you think you need. The material cost difference between a 300-square-foot and 350-square-foot layout is incredibly modest, but the functional difference is huge.
Ignoring the Doorway Transition
Ignoring the transition from the house creates a dangerous disconnected feel. Your new surface should flow naturally from the interior space.
Our installers aim to keep the exterior surface nearly flush with the interior floor, typically aiming for a tiny step down of less than an inch to prevent water intrusion.
Forgetting Privacy and Sightlines
Forgetting about privacy quickly diminishes your daily enjoyment. If neighbors have a direct line of sight into your seating zone, incorporate screening elements like tall plantings, privacy walls, or custom pergola structures.
Neglecting Base Drainage
Neglecting proper drainage stands as the single most expensive mistake you can make. Proper slope requirements are non-negotiable, especially in dense clay soils that trap water against your home foundation.
Bring Your Patio Vision to Life
Designing a space is a highly creative process that blends your personal style with strict structural requirements.
You arrive at your first contractor meeting with a clear vision and realistic expectations by working through these seven steps. This preparation leads to much better communication, highly accurate estimates, and a final result that perfectly matches your initial goals. Understanding how to design a backyard patio ensures the final product truly becomes your perfect outdoor space.
Our team of experienced patio designers and builders in Charlotte is ready to help you bring your backyard vision to reality.
Schedule a free design consultation today and let us show you what is actually possible. We will walk your property together, discuss your distinct ideas, and create a custom layout that delivers the exact results you have been imagining.